
CAMERA WORK
In this section of the Production Stage, we are required to portray our knowledge of camera shots, angles and movements, through a selection of videos and visuals. We will also be testing out some shots, that may be used in our up-coming trailer. The aim is to demonstrate awareness of camera skills, enhance our camera skill and practice different camera techniques.
FILM INSPIRATIONS
Below are some camera techniques from famous horror film trailers that in my opinion, are portrayed well accordingly to the Horror genre.
|
Scream
Camera Angles Used: Point of View & High Angle
Point of View: This shot shows what the subject is looking at. This is so the audience are able to identify and relate with the character. High Angle: This is where the camera is looking down on the subject. This therefore makes the subject minor to the camera's composition. Framing Shots Used: Mid Shot & Close-Up Mid Shot: This shot shows the subject from the waist upwards and is significant because it portrays the actions of the subject in which they are responding to. Close-Up: This shows the subject from the shoulders upwards. This shot is frequently used to portray the fear and horror of the characters reactions. Movement Shots Used: Tracking & Zooming Tracking: This is where the camera tracks the movement of the subject whilst sliding on a track. This is so the audience are able to follow the subjects movement and create a sense of suspense and apprehension. Zooming: This is where the lens is adjusted inwards and outwards on the subject. This shot creates a sense of urgency towards the subject. |
My Bloody Valentine
Camera Angles Used: Worms/Birds Eye View & Two Shot
Worms/Birds Eye View: Both angles were used in this trailer. Worms eye view was used to portray the antagonist and create terror. Birds eye view was used to portray the worry and panic in the protagonists nvc. Two Shot: This shot portrayed both the antagonist and protagonist in the same shot. It created anxiety and despair for the audience and the protagonist (similar/shared feelings). Framing Shots Used: Close-up & Extreme Close-Up Close-Up: This is used to portray the characters nvc so that the audience are able to relate in some way, the concerns that the characters may have. Extreme Close-Up: This is the emphasis on the facial features such as the eyes, nose and mouth. This is used to show worry in the characters eyes. Movement Shots Used: Tracking & Panning Tracking: This is where the camera slides on a track to follow the subjects movement for a period of time. In this trailer, the camera is following movement of the protagonist running. This was to create suspense. Panning: This is the camera moving from one side to another side on a tripod. This portrayed the antagonist through a quick but slow pan across. This created tension for the audience as they did not know for a split second, what was about to be shown. |


|
Texas Chainsaw Massacre
|
You're Next
|


|
Camera Angles Used: Two Shot & Low Angle
Two Shot: This shot portrays two people in the shot and are usually in conversation. In this trailer, two shot is used frequently to display the characters reactions together and to create a sense of dependency on one another. Low Angle: This is used to portray the camera looking up at the subject to signify a sense of superiority and importance. In the trailer, the character is portrayed through a high angle to symbolise fearlessness. Framing Shots Used: Extreme Close-Up & Extreme Long Shot Extreme Close-Up: This shot shows the face and its main features. It implies that the nvc of the characters are vital and enables the audience to feel a sense of fear. Extreme Long Shot: This shows the subject and its surroundings. However, the focus is on the surrounding more so than the subject. This is so the audience can sense a feel of unease and suspicion. Movement Shots Used: Tilting & Handheld Camera Tilting: This is where the camera is moved vertically on a tripod. The camera tilting either up or down creates a sense of doubt of what may be coming. Handheld Camera: This is the camera being held by hand, creating unsteady and disorientated shots. |
Camera Angles Used: Wide Angle & High Angle Shot
Wide Angle: This is used to portray groups and settings. This is due to the lens being short in which it is covering a large field. It creates a small sense of knowing and unconsciousness. High Angle: This is used to portray the camera looking down on the subject. This angle signifies inferiority from the subject but superiority from the camera lens. Framing Shots Used: Close-Up & Mid Shot Close-Up: This shot illustrates the head and shoulders only. It enables the camera to emphasise on the nvc of the character which in horror films, usually show discomfort or fear. Mid Shot: This shot illustrates everything from the waist up. It draws the audiences attention to what the character is doing with their upper body, e.g. trying to kill the antagonist. Movement Shots Used: Zooming & Steadicam Zooming: This is where the subject is adjusted through the use of the camera lens. It is used to exaggerate a sense of importance towards the subject. Steadicam: This is where the camera is operated on the shoulder for steady movement. This is so there is a clear focus on the subject to create impact such as tension. |
CAMERA SPEC
|
|
The camera's that were used to document out camera skill diaries were Canon 7D and Canon 600. Both camera's enabled me to document video's of good quality and resolution. However, I found that the Canon 7D was used better for this purpose. |
|

|
The lens focus refers to how clear you are able to see the image or video that is being taken. On the left is the Canon 600 focus and on the right is the Canon 7D focus.
|

|
|
The camera's shutter speed or the exposure time refers to the length in which the camera's shutter is open for. |

|
|
The camera's ISO refers to how sensitive the camera is to light. The higher the ISO, the more noise that is apparent. It is usually used in dark settings. |

|

|
Aperture is where the background of the image or video is a blur and the focus is on the subject. |
CAMERA DIARY SESSION 1
THURSDAY 15TH OCTOBER 2015
10:40 - 12:10
Day One - Thursday 15th October 2015: Camera Angles & Framing Shots
Today, each production team worked together to produce documented videos on our camera skills. This was so we were able to try out a range of shots for ourselves, that could be used in our trailers. The range of shots that we tested were camera angles and framing shots.
Today, each production team worked together to produce documented videos on our camera skills. This was so we were able to try out a range of shots for ourselves, that could be used in our trailers. The range of shots that we tested were camera angles and framing shots.
|
|
Each individual had to record an introduction to what exactly it was, we were going to portray through the videos. This is so we were able to understand what we were doing and why the camera work stage is important. |
|
Angles that were tested:
|

|
Shots that were tested:
|
CAMERA LOGS - CAMERA ANGLES
Below, are a few of the videos that we filmed consisting different camera techniques. As well as learning and developing our camera skills, we were able to create different ways in which we were presented in the videos. Doing this, enabled our learning experience to be positive.
|
Birds Eye View - the camera is shot straight down onto the subject which can sometimes be combined with movement.
|
Worms Eye View - the camera is shot straight onto the subject and can be combined with a POV (point of view) shot.
|
High Angle - the camera is looking diagonolly down at the subject which can connote authority.
|
Low Angle - the camera is looking diagonally up at the subject which can connote inferiority.
|
|
Canted Shot - the camera is at an angle between landscape and portrait. It is usually disorientated.
|
Wide Angle Shot - the camera uses a wide lens to portray group and establishing shots.
|
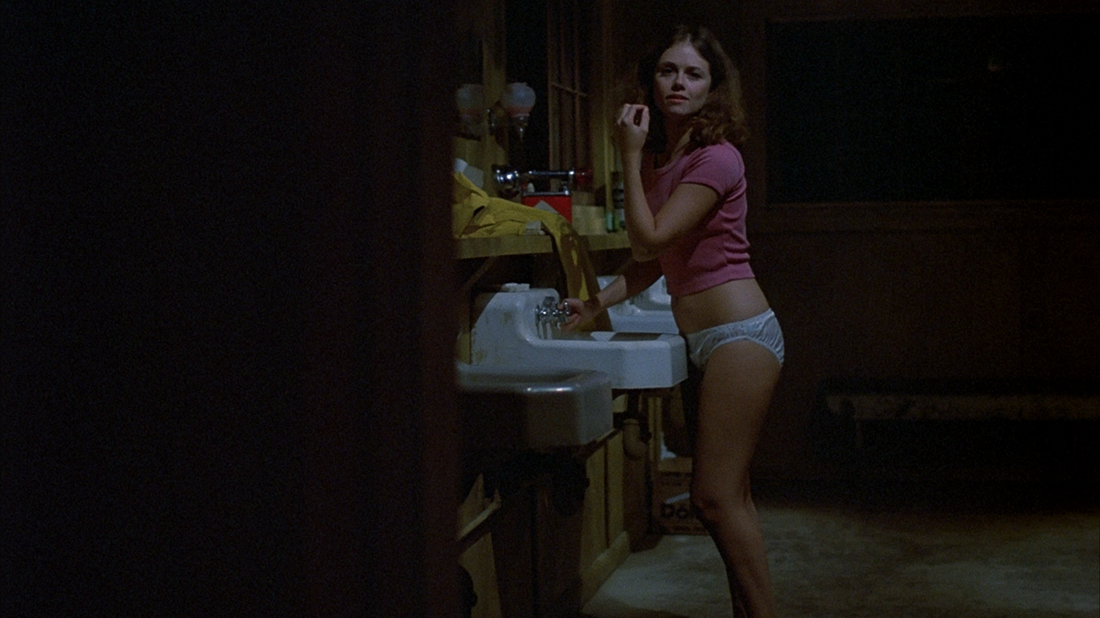
Point of View Shot (POV) - the camera is the subject and is shot at the eye level of what the subject can see.
|
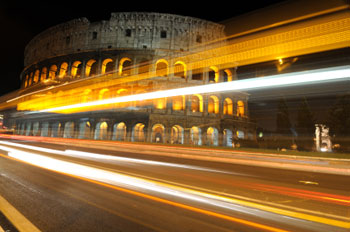
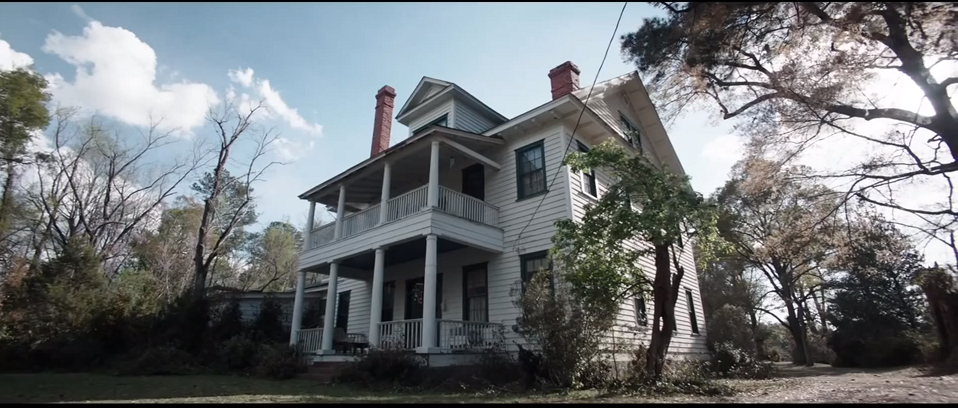
Establishing Shot - the camera portrays the setting or the scene and is usually an opening shot.
|
FILM INSPIRATIONS
|
This is a point of view (POV) shot. This shot is used to focus on the subject and its surroundings from the character's (which is the camera) view. This is a good shot to use as it keeps the identity of who is watching, hidden and also builds tension for the audience as they still wonder who it is. |
|
|
Here is an establishing shot which is used to emphasise the setting of a film. Horror films use this shot a lot to signify the importance of where the film is shot. This is so the audience have an idea of what may happen. A large, isolated house is a common convention in horror films as they represent loneliness.
This is also a low angle which connotes authority. In my opinion this is a good shot to use in horror films. |
CAMERA LOGS - CAMERA SHOTS
|
Extreme Long Shot - this is where the focus is on the surrounding but the subject may be in the distance.
|
Long Shot - the camera is focused on the subject from head to toe and some parts of the surroundings.
|
Mid Shot - the camera is focused on the subject from the waist upwards.
|
|
Medium Close-Up - the camera is focused on the subject from the chest/stomach upwards.
|
Close-Up - the camera focuses on the subject from its head and shoulders.
|
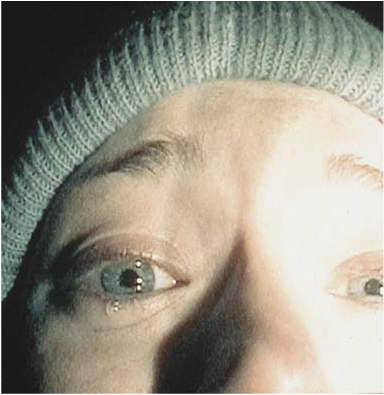
Extreme Close-Up - the camera focuses on the face/main features of the face.
|
FILM INSPIRATIONS
|
Here are two extreme close-up shots from two different horror films. The purpose or the use of this shot is to portray the fear/horror from the subject. In these two cases, the fear comes from the eyes and the mouth. This is so the audience are dramatised and they stay orientated. In my opinion, this is a good shot to use in horror films as it signifies an exceptional reaction. |
|

|
|
Here is a extreme long shot. The use of this shot is to focus on the surroundings more than the subject. It is used to give a general impression rather than specific details. In my opinion, this is a good shot to use in horror films because it gives a sense of suspicion and the 'not knowing' of what is there. |
EVALUATION
Reflecting back on our first session of enhancing our camera skills, I believe that all individuals were able to enhance their camera skills thoroughly whilst enjoying doing so. This enabled myself to think of possible camera techniques that I would like to incorporate within my team and I's trailer.
CAMERA DIARY SESSION 2
FRIDAY 15TH OCTOBER 2015
12:10 - 13:45
Day Two - Friday 15th October 2015: Movement
Today, each production team worked on documented videos that portrayed camera movement. We worked on this so that when it is time for us to film, we know a range of different camera movements to include in our trailers.
Today, each production team worked on documented videos that portrayed camera movement. We worked on this so that when it is time for us to film, we know a range of different camera movements to include in our trailers.
|
Again, each individual had to film an introduction to portray our understanding of what we were doing. This is so we were able to enhance our understanding on camera skills so that our trailers have a wide range of shots. |
|
|
Camera movements that were tested:
|

|

|
Below are videos of a few camera movements that were documented. The videos portray different ways subjects within the shot can operate with the camera movement.
|
Handheld Camera - the camera is held by the operator by hand and can often be unsteady or disorientating.
|
Panning - the camera rotates horizontally on a tripod from side to side.
|
Tracking Shot - the camera slides on a track, following the movement of the subject.
|
Dolly Shot - the camera is moved along the floor whilst on a 'dolly' (this is a flat trolley).
|
Steadicam - the camera is used to follow the subject smoothly whilst the operator has it on their body.
|
FILM INSPIRATIONS

|
This is a shot from the horror film 'The Shining' and is a popular scene of from the film. This is a tracking shot and tracks the boy's movement on the bicycle, through the corridors. In my opinion, this is a good shot to use to track forms of movement as it allows the audience to follow what the subject is doing. |
|
This image shows the camera being handheld by the operator. It is obvious that the camera is handheld because the shot is disorientated and fuzzy. There is also dark patches and light patches which connotes uncertainty. This is a good camera movement to use as it portrays unsteady movement in a awkward environment. |

|
EVALUATION
In regards to our second session which portrayed camera movements, I was able to use different equipment such as the track and tripod to document the different camera techniques. This has developed my camera skills on movement and has now permitted me to use these skills when conducting my trailer.
CAMERA DIARY SESSION 3
TUESDAY 19TH OCTOBER 2015
08:45 - 10:15
Day Three - Tuesday 19th October 2015: Testing Individual Shots to Use Within Our Trailer
Today, each person had to use the camera to create shots hat we may use within our own trailers. To ensure that this was completed successfully, the camera skills that we had learnt and enhanced from the two previous days, are the ones we were to use whilst conducting these documented videos.
Below, are the videos which show camera angles, frames and movement that I decided to document in which they may be used in my trailer. The chosen shots are the ones that in my opinion worked well for a horror film.
|
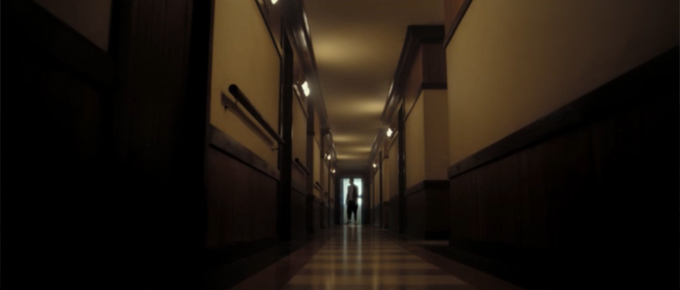
Point of View (POV) - This shot portrayed the antagonist following the protagonist from the antagonist's point of view. This creates a tense scene in which enable the audience to be suspicious of who the antagonist may be. I decided to test this shot out as I felt that in my opinion, would work well in my horror trailer. Also, the situation in which the protagonist is being followed, is a common stock situation within the slasher horror film genre.
|
Point of View (POV) - shot cont. This is the same shot as before but a different testing. I done more than one testing shot to enhance my camera skills for this specific shot so that I could see how it worked well or how it did not work well.
In my opinion, this shot worked well as it portrayed the protagonist through the antagonist's point of view (eye level). |
Zooming and Panning - This shot also portrayed the antagonist and protagonist. I chose to use this shot because in my opinion, displays both characters well in a suspicious way. Again the protagonist is not aware of antagonists where-about and is therefore oblivious to its surroundings.
|
|
|
Zooming and Tilting - This shot portrayed the antagonist and the protagonist. The protagonist was not aware that the antagonist was behind them so is blind to what is about to happen/what may happen. I chose to test this shot because it is a common stock situation associated with the slasher genre.
|
Zooming and Tilting - This shot is the same as the one beside it and portrays the same objective. I decided to do more than one shot so I am able to see how it works well.
|
OVERALL EVALUATION
From using the different camera' s to document videos of my camera skills, I can say that I have learnt different methods of how to operate the camera and what camera technique works well in different contexts. From the shots that were tested, I was able to identify shots that I could use within my trailer and use this without any assistance needed. Overall, the sessions that I took part in, developed my camera skills in which i can now use as an advantage to conduct my final pieces.
